TM
CARATTERISTICHE
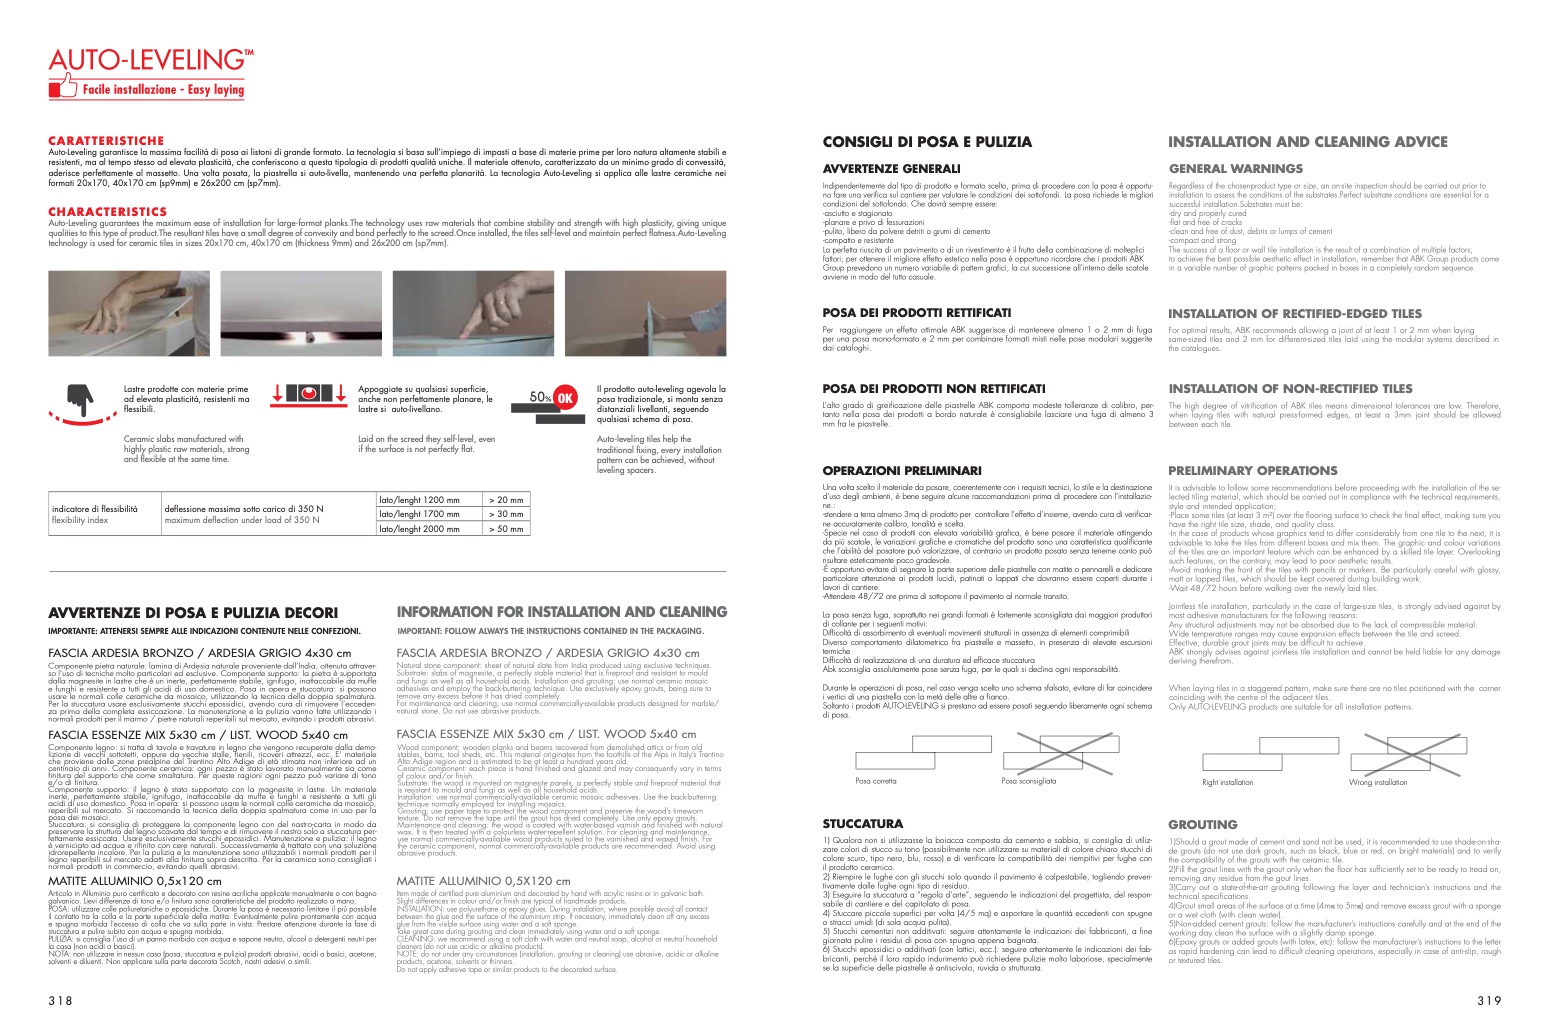
Auto-Leveling garantisce la massima facilità di posa ai listoni di grande formato. La tecnologia si basa sull’impiego di impasti a base di materie prime per loro natura altamente stabili e
resistenti, ma al tempo stesso ad elevata plasticità, che conferiscono a questa tipologia di prodotti qualità uniche. Il materiale ottenuto, caratterizzato da un minimo grado di convessità,
aderisce perfettamente al massetto. Una volta posata, la piastrella si auto-livella, mantenendo una perfetta planarità. La tecnologia Auto-Leveling si applica alle lastre ceramiche nei
formati 20x170, 40x170 cm (sp9mm) e 26x200 cm (sp7mm).
CHARACTERISTICS
Auto-Leveling guarantees the maximum ease of installation for large-format planks.The technology uses raw materials that combine stability and strength with high plasticity, giving unique
qualities to this type of product.The resultant tiles have a small degree of convexity and bond perfectly to the screed.Once installed, the tiles self-level and maintain perfect flatness.Auto-Leveling
technology is used for ceramic tiles in sizes 20x170 cm, 40x170 cm (thickness 9mm) and 26x200 cm (sp7mm).
CONSIGLI DI POSA E PULIZIA
AVVERTENZE GENERALI
Indipendentemente dal tipo di prodotto e formato scelto, prima di procedere con la posa è opportu-
no fare una verifica sul cantiere per valutare le condizioni dei sottofondi. La posa richiede le migliori
condizioni del sottofondo. Che dovrà sempre essere:
-asciutto e stagionato
-planare e privo di fessurazioni
-pulito, libero da polvere detriti o grumi di cemento
-compatto e resistente
La perfetta riuscita di un pavimento o di un rivestimento è il frutto della combinazione di molteplici
fattori; per ottenere il migliore effetto estetico nella posa è opportuno ricordare che i prodotti ABK
Group prevedono un numero variabile di pattern grafici, la cui successione all’interno delle scatole
avviene in modo del tutto casuale.
POSA DEI PRODOTTI RETTIFICATI
Per raggiungere un effetto ottimale ABK suggerisce di mantenere almeno 1 o 2 mm di fuga
per una posa mono-formato e 2 mm per combinare formati misti nelle pose modulari suggerite
dai cataloghi.
POSA DEI PRODOTTI NON RETTIFICATI
L’alto grado di greificazione delle piastrelle ABK comporta modeste tolleranze di calibro, per-
tanto nella posa dei prodotti a bordo naturale è consigliabile lasciare una fuga di almeno 3
mm fra le piastrelle.
OPERAZIONI PRELIMINARI
Una volta scelto il materiale da posare, coerentemente con i requisiti tecnici, lo stile e la destinazione
d’uso degli ambienti, è bene seguire alcune raccomandazioni prima di procedere con l’installazio-
ne.:
-stendere a terra almeno 3mq di prodotto per controllare l’effetto d’insieme, avendo cura di verificar-
ne accuratamente calibro, tonalità e scelta.
-Specie nel caso di prodotti con elevata variabilità grafica, è bene posare il materiale attingendo
da più scatole, le variazioni grafiche e cromatiche del prodotto sono una caratteristica qualificante
che l’abilità del posatore può valorizzare, al contrario un prodotto posato senza tenerne conto può
risultare esteticamente poco gradevole.
-È opportuno evitare di segnare la parte superiore delle piastrelle con matite o pennarelli e dedicare
particolare attenzione ai prodotti lucidi, patinati o lappati che dovranno essere coperti durante i
lavori di cantiere.
-Attendere 48/72 ore prima di sottoporre il pavimento al normale transito.
La posa senza fuga, soprattutto nei grandi formati è fortemente sconsigliata dai maggiori produttori
di collante per i seguenti motivi:
Difficoltà di assorbimento di eventuali movimenti strutturali in assenza di elementi comprimibili
Diverso comportamento dilatometrico fra piastrelle e massetto, in presenza di elevate escursioni
termiche
Difficoltà di realizzazione di una duratura ed efficace stuccatura
Abk sconsiglia assolutamente pose senza fuga, per le quali si declina ogni responsabilità.
Durante le operazioni di posa, nel caso venga scelto uno schema sfalsato, evitare di far coincidere
i vertici di una piastrella con la metà delle altre a fianco.
Soltanto i prodotti AUTO-LEVELING si prestano ad essere posati seguendo liberamente ogni schema
di posa.
INSTALLATION AND CLEANING ADVICE
GENERAL WARNINGS
Regardless of the chosenproduct type or size, an on-site inspection should be carried out prior to
installation to assess the conditions of the substrates.Perfect substrate conditions are essential for a
successful installation.Substrates must be:
-dry and properly cured
-flat and free of cracks
-clean and free of dust, debris or lumps of cement
-compact and strong
The success of a floor or wall tile installation is the result of a combination of multiple factors;
to achieve the best possible aesthetic effect in installation, remember that ABK Group products come
in a variable number of graphic patterns packed in boxes in a completely random sequence.
INSTALLATION OF RECTIFIED-EDGED TILES
For optimal results, ABK recommends allowing a joint of at least 1 or 2 mm when laying
same-sized tiles and 2 mm for different-sized tiles laid using the modular systems described in
the catalogues.
INSTALLATION OF NON-RECTIFIED TILES
The high degree of vitrification of ABK tiles means dimensional tolerances are low. Therefore,
when laying tiles with natural press-formed edges, at least a 3mm joint should be allowed
between each tile.
PRELIMINARY OPERATIONS
It is advisable to follow some recommendations before proceeding with the installation of the se-
lected tiling material, which should be carried out in compliance with the technical requirements,
style and intended application;
-Place some tiles (at least 3 m2) over the flooring surface to check the final effect, making sure you
have the right tile size, shade, and quality class.
-In the case of products whose graphics tend to differ considerably from one tile to the next, it is
advisable to take the tiles from different boxes and mix them. The graphic and colour variations
of the tiles are an important feature which can be enhanced by a skilled tile layer. Overlooking
such features, on the contrary, may lead to poor aesthetic results.
-Avoid marking the front of the tiles with pencils or markers. Be particularly careful with glossy,
matt or lapped tiles, which should be kept covered during building work.
-Wait 48/72 hours before walking over the newly laid tiles.
Jointless tile installation, particularly in the case of large-size tiles, is strongly advised against by
most adhesive manufacturers for the following reasons:
Any structural adjustments may not be absorbed due to the lack of compressible material.
Wide temperature ranges may cause expansion effects between the tile and screed.
Effective, durable grout joints may be difficult to achieve.
ABK strongly advises against jointless tile installation and cannot be held liable for any damage
deriving therefrom.
When laying tiles in a staggered pattern, make sure there are no tiles positioned with the corner
coinciding with the centre of the adjacent tiles.
Only AUTO-LEVELING products are suitable for all installation patterns.
Lastre prodotte con materie prime
ad elevata plasticità, resistenti ma
flessibili.
Ceramic slabs manufactured with
highly plastic raw materials, strong
and flexible at the same time.
AVVERTENZE DI POSA E PULIZIA DECORI
IMPORTANTE: ATTENERSI SEMPRE ALLE INDICAZIONI CONTENUTE NELLE CONFEZIONI.
FASCIA ARDESIA BRONZO / ARDESIA GRIGIO 4x30 cm
Componente pietra naturale: lamina di Ardesia naturale proveniente dall’India, ottenuta attraver-
so l’uso di tecniche molto particolari ed esclusive. Componente supporto: la pietra è supportata
dalla magnesite in lastre che è un inerte, perfettamente stabile, ignifugo, inattaccabile da muffe
e funghi e resistente a tutti gli acidi di uso domestico. Posa in opera e stuccatura: si possono
usare le normali colle ceramiche da mosaico, utilizzando la tecnica della doppia spalmatura.
Per la stuccatura usare esclusivamente stucchi epossidici, avendo cura di rimuovere l’ecceden-
za prima della completa essiccazione. La manutenzione e la pulizia vanno fatte utilizzando i
normali prodotti per il marmo / pietre naturali reperibili sul mercato, evitando i prodotti abrasivi.
FASCIA ESSENZE MIX 5x30 cm / LIST. WOOD 5x40 cm
Componente legno: si tratta di tavole e travature in legno che vengono recuperate dalla demo-
lizione di vecchi sottotetti, oppure da vecchie stalle, fienili, ricoveri attrezzi, ecc. E’ materiale
che proviene dalle zone prealpine del Trentino Alto Adige di età stimata non inferiore ad un
centinaio di anni. Componente ceramica: ogni pezzo è stato lavorato manualmente sia come
finitura del supporto che come smaltatura. Per queste ragioni ogni pezzo può variare di tono
e/o di finitura.
Componente supporto: il legno è stato supportato con la magnesite in lastre. Un materiale
inerte, perfettamente stabile, ignifugo, inattaccabile da muffe e funghi e resistente a tutti gli
acidi di uso domestico. Posa in opera: si possono usare le normali colle ceramiche da mosaico,
reperibili sul mercato. Si raccomanda la tecnica della doppia spalmatura come in uso per la
posa dei mosaici.
Stuccatura: si consiglia di proteggere la componente legno con del nastro-carta in modo da
preservare la struttura del legno scavata dal tempo e di rimuovere il nastro solo a stuccatura per-
fettamente essiccata. Usare esclusivamente stucchi epossidici. Manutenzione e pulizia: il legno
è verniciato ad acqua e rifinito con cere naturali. Successivamente è trattato con una soluzione
idrorepellente incolore. Per la pulizia e la manutenzione sono utilizzabili i normali prodotti per il
legno reperibili sul mercato adatti alla finitura sopra descritta. Per la ceramica sono consigliati i
normali prodotti in commercio, evitando quelli abrasivi.
MATITE ALLUMINIO 0,5x120 cm
Articolo in Alluminio puro certificato e decorato con resine acriliche applicate manualmente o con bagno
galvanico. Lievi differenze di tono e/o finitura sono caratteristiche del prodotto realizzato a mano.
POSA: utilizzare colle poliuretaniche o epossidiche. Durante la posa è necessario limitare il pi
ù possibile
il contatto tra la colla e la parte superficiale della matita. Eventualmente pulire prontamente con acqua
e spugna morbida l’eccesso di colla che va sulla parte in vista. Prestare attenzione durante la fase di
stuccatura e pulire subito con acqua e spugna morbida.
PULIZIA: si consiglia l’uso di un panno morbido con acqua e sapone neutro, alcool o detergenti neutri per
la casa (non acidi o basici).
NOTA: non utilizzare in nessun caso (posa, stuccatura e pulizia) prodotti abrasivi, acidi o basici, acetone,
solventi e diluenti. Non applicare sulla parte decorata Scotch, nastri adesivi o simili.
Appoggiate su qualsiasi superficie,
anche non perfettamente planare, le
lastre si auto-livellano.
Laid on the screed they self-level, even
if the surface is not perfectly flat.
Il prodotto auto-leveling agevola la
posa tradizionale, si monta senza
distanziali livellanti, seguendo
qualsiasi schema di posa.
Auto-leveling tiles help the
traditional fixing, every installation
pattern can be achieved, without
leveling spacers.
indicatore di flessibilità
flexibility index
deflessione massima sotto carico di 350 N
maximum deflection under load of 350 N
lato/lenght 1200 mm
> 20 mm
lato/lenght 1700 mm
> 30 mm
lato/lenght 2000 mm
> 50 mm
INFORMATION FOR INSTALLATION AND CLEANING
IMPORTANT: FOLLOW ALWAYS THE INSTRUCTIONS CONTAINED IN THE PACKAGING.
FASCIA ARDESIA BRONZO / ARDESIA GRIGIO 4x30 cm
Natural stone component: sheet of natural slate from India produced using exclusive techniques.
Substrate: slabs of magnesite, a perfectly stable material that is fireproof and resistant to mould
and fungi as well as all household acids. Installation and grouting: use normal ceramic mosaic
adhesives and employ the back-buttering technique. Use exclusively epoxy grouts, being sure to
remove any excess before it has dried completely.
For maintenance and cleaning, use normal commercially-available products designed for marble/
natural stone. Do not use abrasive products.
FASCIA ESSENZE MIX 5x30 cm / LIST. WOOD 5x40 cm
Wood component: wooden planks and beams recovered from demolished attics or from old
stables, barns, tool sheds, etc. This material originates from the foothills of the Alps in Italy’s Trentino
Alto Adige region and is estimated to be at least a hundred years old.
Ceramic component: each piece is hand finished and glazed and may consequently vary in terms
of colour and/or finish.
Substrate: the wood is mounted on magnesite panels, a perfectly stable and fireproof material that
is resistant to mould and fungi as well as all household acids.
Installation: use normal commercially-available ceramic mosaic adhesives. Use the back-buttering
technique normally employed for installing mosaics.
Grouting: use paper tape to protect the wood component and preserve the wood’s timeworn
texture. Do not remove the tape until the grout has dried completely. Use only epoxy grouts.
Maintenance and cleaning: the wood is coated with water-based varnish and finished with natural
wax. It is then treated with a colourless water-repellent solution. For cleaning and maintenance,
use normal commercially-available wood products suited to the varnished and waxed finish. For
the ceramic component, normal commercially-available products are recommended. Avoid using
abrasive products.
MATITE ALLUMINIO 0,5X120 cm
Item made of certified pure aluminium and decorated by hand with acrylic resins or in galvanic bath.
Slight differences in colour and/or finish are typical of handmade products.
INSTALLATION: use polyurethane or epoxy glues. During installation, where possible avoid all contact
between the glue and the surface of the aluminium strip. If necessary, immediately clean off any excess
glue from the visible surface using water and a soft sponge.
Take great care during grouting and clean immediately using water and a soft sponge.
CLEANING: we recommend using a soft cloth with water and neutral soap, alcohol or neutral household
cleaners (do not use acidic or alkaline products).
NOTE: do not under any circumstances (installation, grouting or cleaning) use abrasive, acidic or alkaline
products, acetone, solvents or thinners.
Do not apply adhesive tape or similar products to the decorated surface.
Posa corretta
STUCCATURA
Posa sconsigliata
Right installation
GROUTING
Wrong installation
318
319
1) Qualora non si utilizzasse la boiacca composta da cemento e sabbia, si consiglia di utiliz-
zare colori di stucco su tono (possibilmente non utilizzare su materiali di colore chiaro stucchi di
colore scuro, tipo nero, blu, rosso) e di verificare la compatibilità dei riempitivi per fughe con
il prodotto ceramico.
2) Riempire le fughe con gli stucchi solo quando il pavimento è calpestabile, togliendo preven-
tivamente dalle fughe ogni tipo di residuo.
3) Eseguire la stuccatura a “regola d’arte”, seguendo le indicazioni del progettista, del respon-
sabile di cantiere e del capitolato di posa.
4) Stuccare piccole superfici per volta (4/5 mq) e asportare le quantità eccedenti con spugne
o stracci umidi (di sola acqua pulita).
5) Stucchi cementizi non additivati: seguire attentamente le indicazioni dei fabbricanti, a fine
giornata pulire i residui di posa con spugna appena bagnata.
6) Stucchi epossidici o additivati (con lattici, ecc.): seguire attentamente le indicazioni dei fab-
bricanti, perché il loro rapido indurimento può richiedere pulizie molto laboriose, specialmente
se la superficie delle piastrelle è antiscivolo, ruvida o strutturata.
1)Should a grout made of cement and sand not be used, it is recommended to use shade-on-sha-
de grouts (do not use dark grouts, such as black, blue or red, on bright materials) and to verify
the compatibility of the grouts with the ceramic tile.
2)Fill the grout lines with the grout only when the floor has sufficiently set to be ready to tread on,
removing any residue from the gout lines.
3)Carry out a state-of-the-art grouting following the layer and technician’s instructions and the
technical specifications.
4)Grout small areas of the surface at a time (4m� to 5m�) and remove excess grout with a sponge
or a wet cloth (with clean water).
5)Non-added cement grouts: follow the manufacturer’s instructions carefully and at the end of the
working day clean the surface with a slightly damp sponge.
6)Epoxy grouts or added grouts (with latex, etc): follow the manufacturer’s instructions to the letter
as rapid hardening can lead to difficult cleaning operations, especially in case of anti-slip, rough
or textured tiles.

